
For a number of years now I’ve wanted to learn how to make things on a sewing machine. But let me be clear — I’m not talking serious sartorial aspirations here. Rather, I’m talking very simple things like utilitarian bags and dust covers and maybe a better fitting protector for the dome port of the underwater camera housing. Right now the closest thing to clothing on my list is a heavy-duty apron for when I’m working on dirty, greasy projects in the garage.
A couple of weeks ago a confluence of events pushed me to take my first steps in this direction. A friend, who knows about these things, graciously agreed to accompany me to the local Jo-Ann Fabrics store to help me select fabric for my first project and provide sewing-ninja-level advice on how to proceed, the details of which should be the subject of a subsequent post. For now it’s enough to know that this is how I ended up back home with two yards of canvas fabric, sewing machine needles, and a feeling of unfettered optimism. This was going to be cake.
I inherited my grandmother’s sewing machine when she passed in September of 2016. It had sat on a shelf in the basement all this time, along with her craft box of bobbins, scissors, straight pins and the like. I always knew it was down there and I always knew that I would get around to using it some day. Today, it appeared, was that day.
I brought the machine and the craft box upstairs and examined them closely for the first time in all these years. I lifted off the protective cover and was immediately struck by the sight of the post-it note with my grandmother’s handwriting still stuck to the front of the machine. The machine was a PFAFF Hobbymatic 955 and “Made by PFAFF in West Germany” was printed on the right hand side. “West Germany”. Now that was interesting. Then, on the lower right, I noticed two rows of buttons labeled with Viking runes. A table of similar runes, multi-colored and labeled with letters, was printed on the machine body above the buttons. Ah, this was some sort of Rosetta stone and the buttons allowed for selecting different stitches. “Fancy”, I thought to myself.
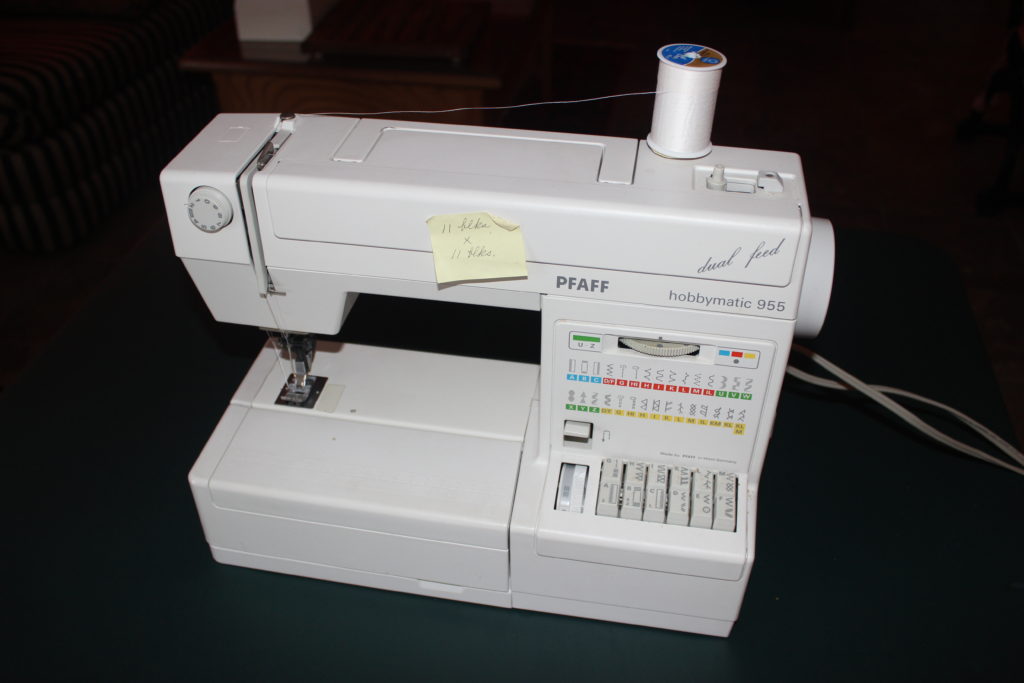
The machine featured a small, removable caddy and inside I found extra needles, what appeared to be the original tube of sewing machine oil, a seam ripper, and the most interesting artifact of all: a yellow receipt from the Barlond Sewing Center dated September 1991, at the top of which my grandmother had written “What pd. for my sewing machine.” The years had faded the ink, rendering the line items difficult to make out, but with effort I could see that after getting $122 for trading in her “2001 Singer” (2001 Singer Touch Tronic?), she paid $924.23.
Nine hundred twenty four dollars.
And twenty three cents.
I’ll grant you, I know (well, now I suppose, I knew) next to nothing about sewing machines, but that struck me as a staggering sum to pay for a sewing machine. In 1991. And paid by my grandmother. Somehow that expense just didn’t match my impression of my grandparents, children of the Great Depression, as being thrifty and frugal.
In the craft box was the machine’s original instruction manual, which I read from cover to cover. It still contained all her notes to herself neatly attached to key pages for easy reference, her inimitable, carefully printed script instantly recognizable. It was at that moment I realized that these things before me weren’t simply Grandma’s old sewing machine and some hand-me-down sewing paraphernalia. In a microsecond they had been quietly transformed into an unexpected and intimate connection, or maybe, a re-connection, with her. Some projects come with truly unanticipated gifts.

Feeling like I now had a respectable understanding of the tools at my disposal, it was time to sew my first stitches. My aforementioned sewing consultant had advised me to wash my fabric before cutting pieces to sew. She had also advised me to sew the raw edges together to help mitigate unraveling in the washing machine. I remember her asking me, “Are you sure the sewing machine works?” to which I replied, “It was still working when Grandma died, so I think the odds are good.” Up until this point, I hadn’t plugged in the machine and turned it on, let alone touched the foot pedal to see if anything moved.
Carefully following the diagram in the manual, I snaked the thread around the thread guides and the take-up and then through an impossibly small hole in the needle.
I plugged in the machine and pushed the power button. A light came on. A very promising beginning.
I pushed the button that the manual assured me would yield a straight stitch, turned a wheel to select a very long stitch length, lowered the presser foot onto the folded fabric and lightly depressed the foot pedal.
The machine sprang to life and laid down five or six stitches. “Yes! The odds are good!” I thought to myself.
Ah, confidence. Dear Reader, always remember that confidence is that feeling you get before you truly understand the situation.
I decided to try the lever that is supposed to reverse the direction of the stitch. The lever felt a little stiff, but I held it down and the machine reversed direction. Excellent. I released the lever but the machine didn’t immediately resume the normal direction; it sort of hesitated in one place for a couple of stitches as if uncertain of my command, and then lazily began marching forward again. “Huh. I must not understand everything about that lever” I thought to myself.
I finished sewing the raw edges together and felt very confident that I had proven that the machine worked and that I would soon be well on my way to completing my first sewing machine project. In retrospect I suppose that was true. I was only mistaken as to the nature of that first project.
A couple of days later I ripped those stitches out of the washed and relaxed fabric, ironed it, and then cut out the first pieces to sew together. I was preparing to sew my very first seam (let’s just ignore that Home Economics class in junior high school, shall we?) when in a flash of insight I realized that it would be prudent to try out, say, the overlock stitch that I was planning to use on the seam allowances. (Look at me throwing around sewing terms like I know what I’m doing!) I depressed two buttons that, as best as I could tell from the manual’s runic explanations, were supposed to give me an overlock stitch. I then attempted to sew that stitch on a scrap of fabric.
All I got was a straight stitch. In fact, no matter which buttons I selected, all I could get was a straight stitch. For some reason, at some point, I decided to depress the lever to reverse the stitch direction and then observed that when I released the lever, the machine paid absolutely no mind.
Awesome. I now had a machine that would sew only straight stitches and only in reverse.
It was at this point, as I was lifting and lowering the lever for the presser foot so as to adjust the position of the fabric, that I noticed that the foot no longer wanted to descend completely and touch the fabric. It would descend a bit, very slowly, cautiously even, as if on a pneumatic piston, and then stop well short of the fabric.
“Oh I see. Right here is where this project goes off the rails,” I thought to myself.
At this point I did what any self-respecting engineer would do. I initiated disassembly. I also simultaneously began searching the Internet for sewing machine repair blogs, repair manuals, and repair videos. In short order I discovered how to take off the plastic cover to expose the light bulb and the presser and needle bars along with all their associated machinery, and was immediately sobered by how complex everything looked in there. “Stay calm. Work the problem,” I told myself. But the source of the problem did not reveal itself and I was compelled to disassemble further, convinced that I needed to expose more mechanisms and linkages in order to understand and subsequently heal this little, broken robot.
I could find no repair manuals online for the PFAFF Hobbymatic 955 and spent the best part of a Sunday afternoon trying to figure out how to remove the machine’s plastic cladding without breaking it. I was able to remove the plastic top and the metal base, but crucially I could not figure out how to remove the plastic covering under the machine bed nor the plastic pieces cladding the “tower” that housed the motor and those mysterious, runic buttons. Someone had put it together years ago and it didn’t seem like the pieces were glued. I really ought to be able to take it apart. There must be some trick. Was there a particular order to the removal? I paused the project to make dinner.
Visible progress was stalled for the next day or so, but the problem of getting the cladding off continued to churn in my subconscious. The breakthrough came when it occurred to me that when a manufacturer releases a new model of a machine, it’s typically an evolution of its predecessor, not a complete redesign of it. One keeps the design features that have proven themselves over time, thereby saving money in other places like tooling, manufacturing and repair. With this in mind, I searched online for repair manuals for close descendents of the PFAFF Hobbymatic 955 and was quickly rewarded.
I downloaded the manual from a typically sketchy website. Why is it that all websites serving up PDF files of manuals appear to have been set up by B-team eastern European hackers? I’ve worked in computer networking and security for most of my career and even I had to be very careful about where and what I clicked. It’s really no wonder that the computer of every grandparent on the planet is infected. But I digress.
Within the first few pages of my manual appeared a beautiful exploded diagram of the plastic pieces and how they attached to the cast iron substructure of a machine that looked nearly identical to my own. I saw that there was an order for removing the pieces. The piece on the back side of the tower was locked in place with plastic tabs. With a little bit of pressure applied to the side opposite the hand wheel, one can release that piece and rotate it off the back. Screws fastened the frontside piece to the cast iron and the remaining pieces were thereafter easily removed to expose the wondrous insides. Now we were really getting somewhere.
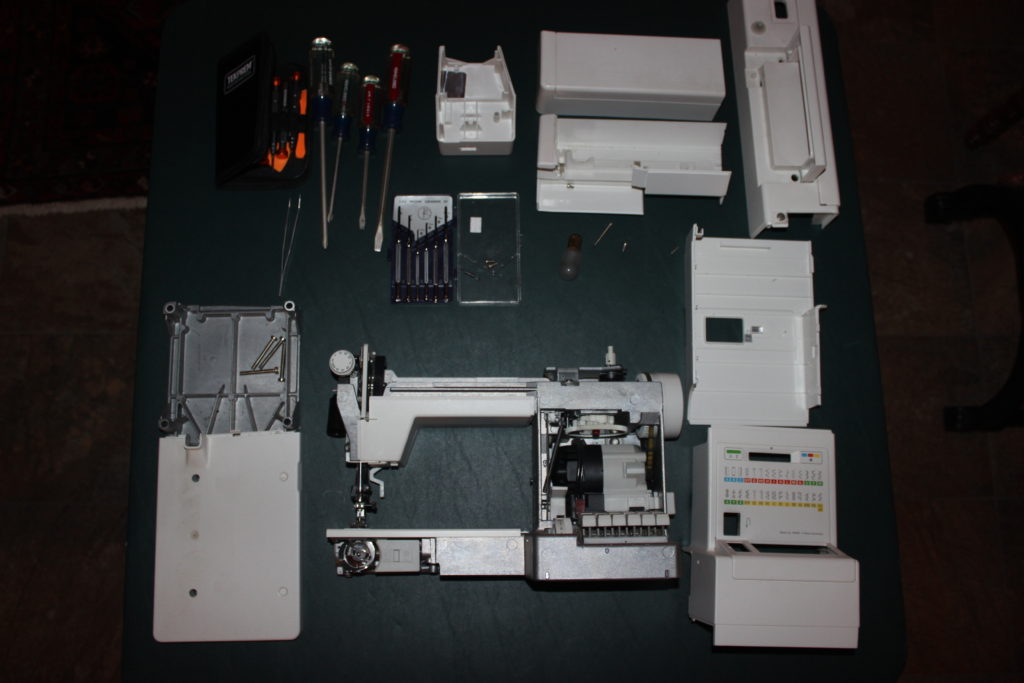
The PFAFF Hobbymatic 955 is a completely mechanical device, having no electronics to control the needle’s motion. The mechanisms and cams under the buttons reminded me of a loom or maybe a player piano. It was at this point that I seriously began to wonder how deep this rabbit hole might go and how I could possibly stay organized enough to be able to reassemble the pieces when the time came. I had visions of turning the living room into a miniature version of an aircraft hanger in which the TSA, FAA and FBI had organized the wreckage for the investigation of a plane crash, labeling each screw, gear and rod. I said a little prayer, beseeching the Great PFAFF that it wouldn’t come to that.
A couple of blog posts (here and here) gave me a place to start looking for both the presser foot and the reverse-lever issues. I first turned my attention to the presser foot. The presser foot is attached to a vertical, hollow, presser bar that would be better named a presser tube. After some examination and prodding, I was able to remove the plate that sits above the presser bar, exposing the spring sitting inside it and which is largely responsible for pushing the foot against the fabric. The spring was stuck inside the bar, encrusted with hardened lubricant of some sort. I was finally able to free it after a minute or two of gentle twisting and pulling.

I cleaned the spring of the hardened lubricant with some mineral spirits and then started to think about how to clear the interior of the hollow bar as well. I knew I was stepping onto some shaky ground here because I wouldn’t want anything that I put into that tube to get stuck. Looking back, I should have used a Q-tip. Or maybe I really should have just left it alone. Instead, and all the while ignoring that little voice in my head, I used a small piece of paper towel soaked in mineral spirits and rolled into a little cigar. I inserted it part way into the presser bar and used a jeweler’s screwdriver to work it against the inside surface of the bar. It was working swimmingly, cleaning the old grime from the inside, and that’s about when I lost control of the situation.
I pushed that little, wet cigar so far down into the tube that I couldn’t get it out again, not even with the tiny tweezers that I use for picking and placing the miniature screws that hold laptops together. In a quiet, growing panic, I began brainstorming and trying improvised tools that might save the day. A long piece of copper wire. Nope. A long hex wrench. Fail. I felt a bit like those chimps one sees in nature documentaries using twigs to fish for ants and termites. No matter what I did, every attempt simply pushed the cigar further down the tube until I wasn’t even able to rip little pieces from it with whatever I put down there. I was musing about the sageness of squirting a bit of lighter fluid in there and setting it on fire when suddenly my power drill came to mind. Maybe I could use a small drill bit and twist that cigar, now jammed firmly into the bottom of the tube, onto the bit. That seemed like maybe something to try before the fire idea.
I fetched my 30 year old Craftsman drill, chucked a small drill bit, and gently inserted the bit into the tube until it hit bottom. With a little trepidation, I gingerly squeezed the trigger on the drill.
Oh how horrified Grandma would have been to see me at that moment, bent over her thousand dollar sewing machine and deliberately driving an electric drill into its delicate, mechanical guts.
It all felt wrong. Wrong like using barbecue tools to repair a pocket watch. But then…But then I didn’t care because it worked! I pulled the drill bit up and out of the presser bar and with it came a dirty little cigar shaped piece of paper towel. Mission accomplished!
I oiled the newly cleaned spring very lightly with sewing machine oil, placed it inside the presser bar, and replaced the metal plate that holds it in place. It was deeply gratifying to see the foot lower decisively, even enthusiastically, and press against the feed dogs as I lowered the presser foot lever.
Unfortunately that feeling of gratification was short-lived. Sometime after the start of this surgery, I had taken to occasionally turning the hand wheel. I did this mostly because I found it reassuring to see that the machine still moved as a sewing machine should despite the violence I was visiting upon it. This time however, the hand wheel would not turn. Or rather, it wouldn’t turn completely. Something was binding at the top end of the needle’s travel, preventing the wheel, and everything to which it was attached, from making a complete rotation. Balls! I had only cleaned and reinstalled a spring. I hadn’t touched anything else in the entire drivetrain!
Except that I had. I remembered that, at some point, I had loosened and then re-tightened the screws attaching various brackets to the presser bar, and had naturally done so without having the slightest idea as to what they controlled. I hadn’t noticed the brackets move, but maybe they had.
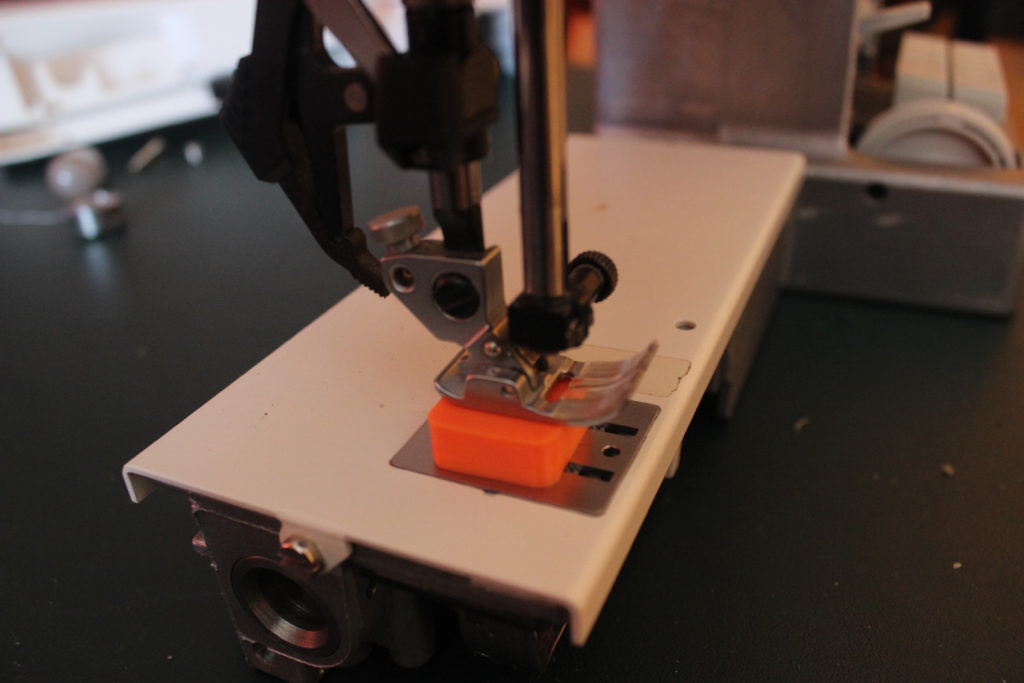
I went back to my downloaded repair manual and found a diagram of presser and needle bar mechanicals appearing to exactly match those in front of me. There were several pages devoted to “Adjusting the presser bar height” and “Adjusting the top foot feed.” Per the manual, “with the presser bar raised there should be a clearance of 8mm between the needle plate and the sewing foot shoe of the zigzag foot.” This is accomplished using “sewing foot gauge 63114690-35” which is placed under the foot to hold it up and in place while screws are adjusted.
Huh. Sewing foot gauge 63114690-35. Of course I don’t own a “sewing foot gauge 63114690-35”, and I’m relatively sure that nobody else really does either. But I do own a 3D printer and so I quickly designed and printed an 8mm tall block and proceeded to follow the instructions for adjusting the presser bar height and the top foot feed. It wasn’t long before I had restored proper motion to the hand wheel and the rest of the drivetrain.
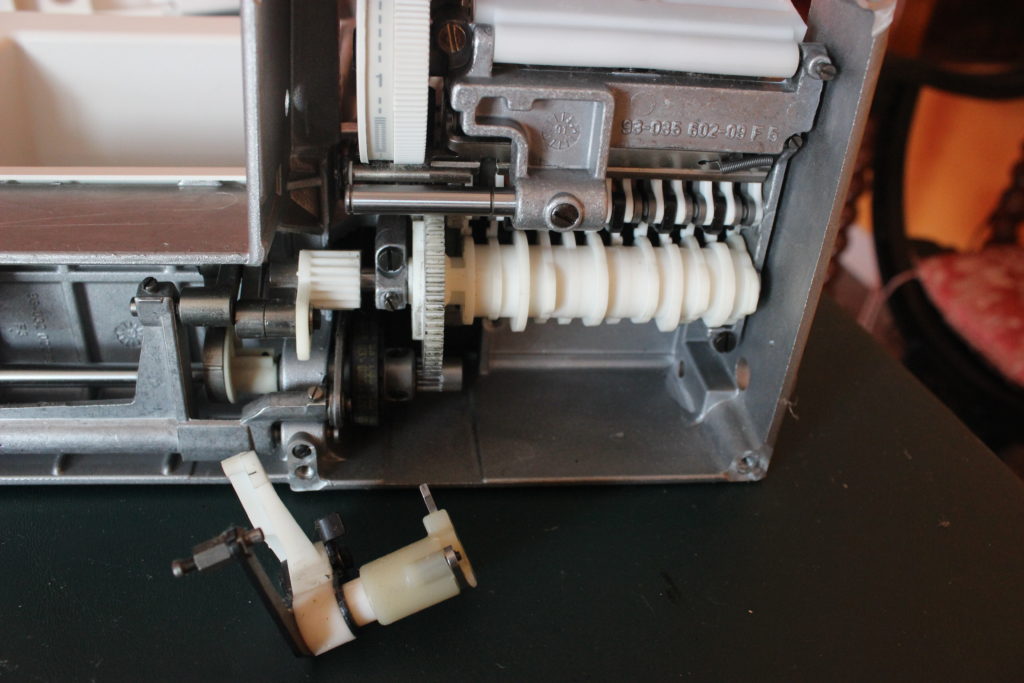
With the presser bar fixed it was time to attend to the issue with the reverse-lever. One of the blog posts referenced earlier suggested that a lazy lever could be the result of pieces not moving on a shaft as they should. I unclipped a couple of springs, removed two retaining rings, and loosened the set screw on the shaft. With very little effort I was able to remove the shaft and the plastic pieces that rode on them. I didn’t see any of the hardened lubricant on the shaft that I’d seen on the presser bar spring. Even so, I cleaned the plastic pieces, oiled the shaft and reassembled everything. The hardest part of the whole process was reattaching those little springs as they threatened to slingshot across the room and disappear down a furnace vent. Compared with the previous apocalyptic adventure with the presser foot, this was a trip to a pre-COVID grocery store. I applied tiny amounts of oil to other linkages that were within easy reach and then worked the reverse-lever a bit. It was positively snappy.

It was time to close up the patient. The plastic cladding went back on without any drama and I looked around to verify that there were no leftover, forgotten screws or springs. I was coasting to the finish line. In every successful project, there is always a Last Problem. Could it be that this project’s Last Problem was behind me?
I plugged in my newly refurbished PFAFF Hobbymatic 955 and threaded the needle. I placed another scrap of fabric on the stitch plate, lowered the presser foot and turned on the machine. After asking the Great PFAFF for his blessing a second time, I selected the runes for a straight stitch and slowly depressed the foot pedal. The machine came to life and began to lay down a beautiful line of perfect stitches. With the foot pedal still depressed, I pushed and held down the reverse-lever. The feed dogs immediately responded to my command and the stitches were laid down in the reverse direction. I released the lever and the dogs reversed direction once again. Everything felt so snappy! Gone was the lazy, directional disobedience from before.
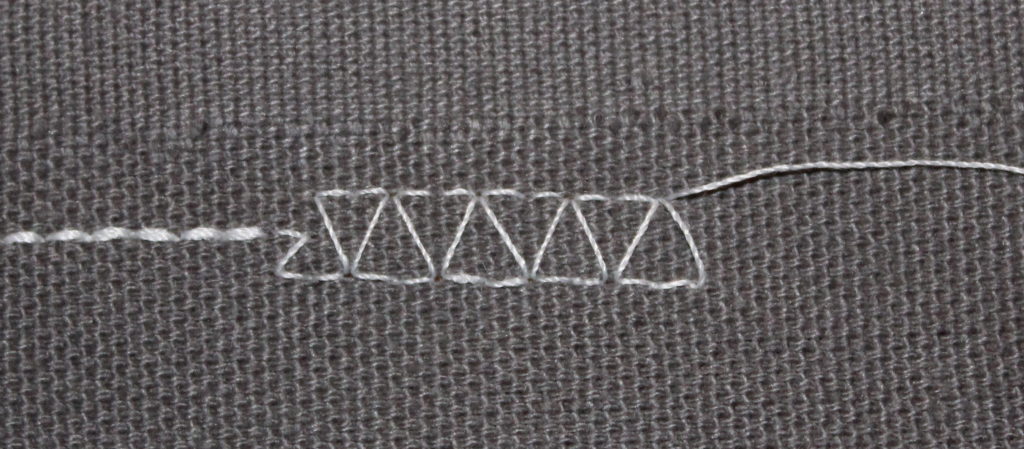
The 955’s final test of sartorial readiness would be the overlock stitch. I again selected the appropriate runes from the row of buttons and depressed the foot pedal. With a mixture of joy, satisfaction and deep relief, I watched as West German mechanical magic set a perfect overlock stitch into the fabric. Sweet success.
“Are you sure the sewing machine works?” she asked.
“I think the odds are good,” I replied.